

This text effect is useful in creating beautiful typography. This is possible with the help of Photoshop clipping mask. We will create a text and instead of filling it with color, we will use an image to fill the
text.
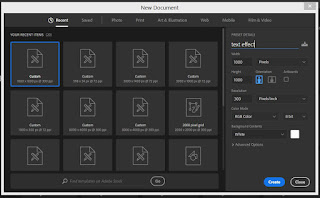
Step 1
Create a Photoshop document. I used a square document 1000px by 1000px. I named the document "Text Effect". Feel free to create a document with your own dimensions.

Step 2
Since we have created a plain white document, we can now load the image you want to fill the text with. Go to File > Place Embedded. Select the image from the folder in your laptop

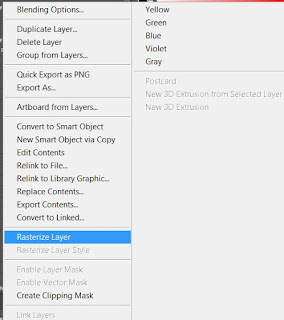
Step 3
Rasterize the picture by right clicking on the image and selecting Rasterize layer. The rasterizing will make the image editable.

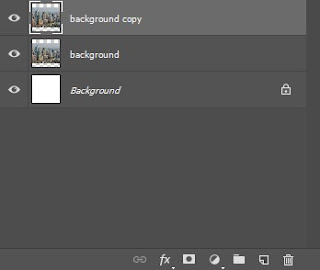
Name the image "Background". You can do this by clicking inside the original name of the text. Rename it and hit ENTER on your keyboard to save.


Step 4
Duplicate the image layer by selecting the layer with the image and press CTRL + J (Command for Mac). Once you duplicate, you will see that the images are now in two layers. This new layer is "Background Copy"

Step 5
Create a new layer between the two image layers. This is not straightforward. If you select the "Background copy" layer and create a new layer, it will appear above it. For the layer to appear in between the two image layers, hold CTRL while selecting the "Background Copy" layer and click on the "Create new layer" icon.
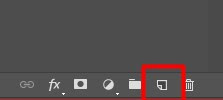

A new layer appears in between the two image layers.


Step 6
Fill the new layer with white color. You can do this in two ways.
Go to Paint Bucket Tool, make sure your foreground color is White. With the Paint Bucket Tool selected, go to your document and click. It fills it with white color

Alternatively, go to Edit > Fill. A dialog box appears, select White in the Use option.. Then hit OK. You might not notice the color because the Background Copy layer is above it. However if you close the visibility of the Background Copy layer, you will see it.

Step 7
Add your text. To do this, select the Background Copy Layer so that when we type, it will create a new layer above it

Select your Type Tool and type any word you wish. I typed "CITY" .


You can change the font type, size. The color of the text does not have impact on the effect. So feel free to use any color.
Step 8
Drag the text you have created below the Background Copy layer. As you do this, the text become temporarily invisible. To drag, select the layer with the text, hold your left click down and drag with the mouse till you get to your target layer.


Step 9
Now we have to create a clipping mask. This effect will place the image inside the text. Select the Background Copy layer and right click. Chose Create Clipping Mask


Now you have a good text effect

I added some effects like Drop Shadow, Inner Shadow and Outer Glow. To do this, right click on the text layer and chose Blending Options. You will see all the effects. You can chose anyone and add styles to your text appearance


0 Comments