Dispersion effect is one of the most popular style used by designers to create a motion like effect in photographs. It is beautiful and artistic. It could be used in advertisements, magazines, flyer designs and music album arts. With good brush and technique, you can create this effect with ease
In this tutorial, I will use Photoshop CC 2018. You can follow up with your own version of
Photoshop. The method still remain the same.
Step 1
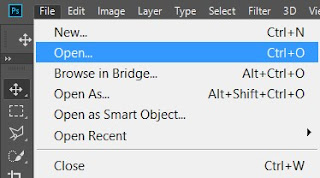
Open the image you will use using CTRL + O. In your image selection, make sure you use a picture that reflects movement or motion. Think of a dancer or someone running. I chose a picture of a model jumping up.
Step 2
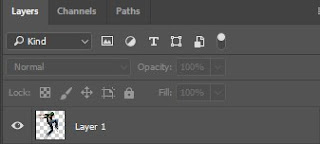
Remove your image from the background. In this tutorial, I used a transparent png downloaded from Pixabay. Hence my picture comes without a background. However if your picture has a background, use quick selection tool or pen tool to make a selection and cut out the image from the background.

Step 3
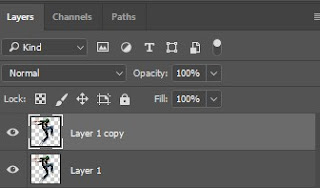
Duplicate the image. To do this, select the layer with the image and press CTRL + J (Command for Mac)
Step 4
Now is time to apply the dispersion effect. Make sure you select the duplicate layer. Go to Photoshop control panel, chose Filter > Liquify (SHIFT + CTRL + X).
Step 5
Use the Foward Warp Brush. Smudge on the image to the left or right depending on your picture.
Step 6
Move the layer with smudged effect below the image layer without any smudge effect
Step 7
The critical stage. Pay attention to details here. Go to the layer without smudging and chose layer mask. Layer mask is found in the layer panel. It will turn to white.
Then go to the layer with smudged layer, hold Alt (Option for Mac) and then click on the layer mask. This time it will turn the mask to black
Step 8
Set Foreground color to White.
Go to Brush (shortcut is B) and chose splatter brush. You can download the brush on Brusheezy. Leave the brush opacity at 100%
Step 9
Go to the layer with smudged image and start painting with your brush by tapping rather than dragging. The effect will start coming out.
Step 10
Go to the layer without smudging. Make sure you select the layer mask and not just the layer Change the foreground letter to Black by using keyboard letter X. Then select your brush and splatter again till you are satisfied
After splattering, you have a beautiful dispersion effect.
Feel free to drop your comments and contribution in the comment box below


0 Comments